Freshwater Angelfish are among the most elegant and beautiful tropical aquarium fish in the hobby. These gorgeous creatures are straightforward to care for, and they’re incredibly easy to breed, too!
So, if you fancy undertaking a fun project, raising Angelfish in your home aquarium could be the perfect challenge for you.
Read this comprehensive guide to breeding freshwater Angelfish, including how to care for their eggs and fry.
How To Distinguish Male And Female Angelfish
Before you can begin your breeding project, you’ll need one male and one female Angelfish. So, how do you tell the sexes apart?
Juvenile Angelfish
Unfortunately, it’s pretty much impossible to tell the boys from the girls until the Angelfish are over six or seven months of age and they begin to form pairs. However, once the fish are over that age, there are some notable physiological and behavioral features to watch out for that I’ve listed below.
Female Angelfish Characteristics
First of all, female angelfish are much less territorial than males, unless a female is guarding her eggs.
When it comes to their physical appearance:
Female Angelfish
- are usually quite a bit smaller than males.
- don’t have the pronounced nuchal hump that males do.
- have a more sloping facial profile than male fish.
- have rounder, smoother ventral fins than males.
- have a more angular belly profile than males.
- have a much wider cloaca than males.
- have a wide, blunt ovipositor or breeding tube.
- develop a swollen abdomen during the spawning season because it’s packed with eggs.
Male Angelfish Characteristics
Male Angelfish are quite obviously different from their female counterparts.
Male Angelfish
- grow more quickly than females
- have much larger, more circular bodies than females.
- have a pronounced nuchal hump or lump on their forehead.
- have a thin, pointed breeding tube
- have forked ventral fins
- have a much narrower cloaca than females
Male fish are very territorial and can be pretty aggressive characters, especially during spawning and when guarding eggs.
Do Angelfish Pair For Life?
Although Angelfish form devoted breeding pairs, they don’t pair up for life. Once breeding is over, the fish generally go their separate ways.
How To Choose A Breeding Pair
The most straightforward way of choosing an established breeding pair of Angelfish is to buy some from a reputable breeder or a good fish store or online. However, it’s considerably less costly to start off with a small group of fish and put them together in an aquarium. The fish will quickly form their own pairs naturally.

When choosing Angelfish for breeding, look for individuals that are strong and eating well. Check each fish for any obvious external injuries, such as torn fins, skin damage, etc., and avoid buying any fish that appear to be underweight, are very small, or lethargic.
Your potential breeding pair needs to be at least 2 inches in size to be mature enough to breed.
Breeding Your Angelfish
So, you have your breeding pair of Angelfish; what next?
How To Set Up An Angelfish Breeding Tank
Although it is possible to breed Angelfish in a community tank, the eggs and fry are usually gobbled up by the other aquarium residents, which is what happened in my fish tank. So, to give your Angelfish breeding venture the best chance of success, I recommend that you set up a dedicated spawning tank that contains only your breeding pair.
Tank Size
Ideally, you want an aquarium that’s at least 16 inches high, as Angelfish are quite a tall species, and the tank should have a capacity of around 20 gallons or greater. If you keep the fish in a tank without sufficient space, their growth will be stunted, and they might not breed.
Water Conditions
The water should be kept clean, and you must carry out frequent partial water changes of around 40% every other day to maintain excellent water quality. Angelfish don’t appreciate a very strong flow when spawning, so it’s best to use a sponge filter. Be sure to vacuum the tank to remove solid waste from underneath the decorations and under the filter box.
The temperature in the tank should be kept between 80o and 85oF to encourage spawning. Angelfish needs soft water that’s slightly acidic, and ideally, you want a water pH of between 6.5 and 6.9.
Decorations

Don’t put gravel substrate in the spawning tank, as the eggs will be lost between the pieces of gravel and won’t hatch. Instead, leave the tank bottom bare.
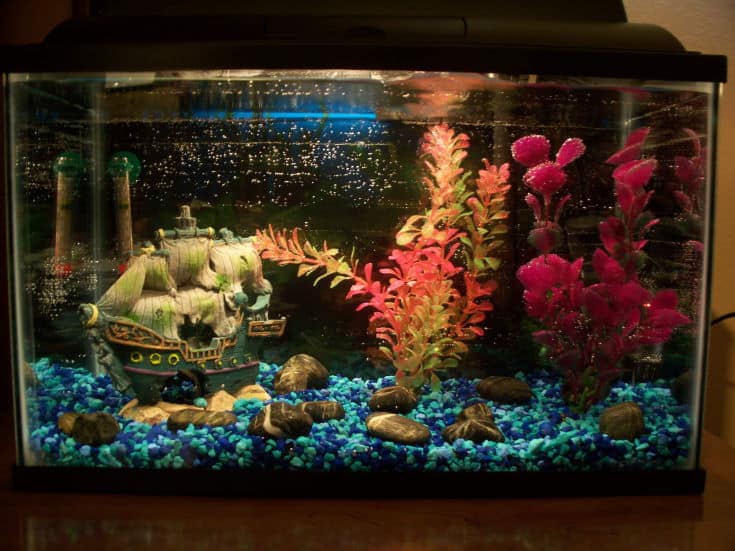
It’s a good idea to include a spawning slate, some driftwood, and a few plants in the setup. A spawning slate makes it easier to remove the eggs if necessary to prevent the fish from eating them.
Bringing The Angelfish Into Spawning Condition
As well as providing the Angelfish with a suitable spawning tank, giving them a varied, nutritious diet is essential to bring the fish into breeding condition.
The fishes’ basic diet should consist of commercially produced food that’s specifically formulated for Angelfish. However, it’s beneficial to add supplements in the form of meaty foods, including daphnia, mosquito larvae, brine shrimp, beef heart paste, and microworms. You can also feed the Angelfish some blanched veggies, such as zucchini, spinach, and skinned peas.
Live food makes a nutritious addition to the fishes’ diet that’s excellent for bringing them into prime breeding condition. However, you must be careful that you only use live food from a reliable source, as you don’t want to introduce parasites or bacteria into your tank.
Be careful that you don’t overfeed your Angelfish. Give the fish only what they will eat in around five minutes, and remove any leftovers that would otherwise decompose in the tank and pollute the water. Leaving the tank floor bare makes it relatively easy to vacuum away any uneaten food and solid fish waste.
Angelfish Spawning Behavior
Angelfish generally breed readily, as long as they’re provided with the right conditions and a good diet. Most likely, you’ll come home from work or school one day to discover a whole lot of eggs on the spawning slate or another surface in the tank. However, there are a few typical spawning behaviors to be on the lookout for that can tell you when the fish are about to begin breeding.
Once the breeding pair is established, they will select their preferred spawning site and start cleaning it together.
When a female Angelfish is pregnant (gravid), she becomes more aggressive toward her partner and other tank residents, and her belly becomes swollen with eggs.
A pair of spawning Angelfish will often groom each other, lock their mouths, twist around each other, flash their fins, and face off. That’s perfectly normal courting behavior for this species, so don’t be concerned that the loving couple are having a tiff!
Egg Laying
The female Angelfish deposits her eggs on the spawning slate in neat and tidy, evenly spaced rows. If the female doesn’t want to use the spawning slate you’ve provided, she will lay her eggs elsewhere in the tank, often over the flat leaves of plants.
As the female deposits her eggs, the male Angelfish follows the female, touching all the eggs with his papilla and fertilizing them.
How To Tell If Angelfish Eggs Are Fertilized
You can tell if your Angelfish eggs are fertilized by their color.
- Healthy, fertilized Angelfish eggs are a translucent brownish or pale amber color.
- Usually, eggs that are unfertilized or dead turn white.
So, what causes Angelfish eggs to turn white?
Why Do Angelfish Eggs Change Colors?
There are several reasons why your Angelfishes’ eggs would change color.
Fertility Problems
Once the female Angelfish has deposited her eggs, the male must fertilize them right away by following the female and releasing his sperm over the eggs.
If the male fails to do that, the eggs will quickly die and turn white.
Fungus

If the eggs appear to have been fertilized but subsequently change color, it’s likely that fungus is to blame.
Fungus tends to grow in tanks where water conditions are poor, so, provided you keep your tank in pristine condition, you shouldn’t have an issue with fungus in your Angelfish spawning tank. The water around the eggs must also be well-oxygenated to protect them from fungus, and an air stone placed in the aquarium can be effective in doing that.
If any of the eggs are infected with fungus, you can treat the water with a fungicide, such as methylene blue, to protect the remaining eggs.
Poor Water Quality

Angelfish are highly intolerant of poor water conditions where there is a high concentration of ammonia and nitrites, and their eggs and fry are no different.
If you keep the water in the spawning tank in pristine condition, you shouldn’t have issues with poor water quality affecting the eggs.
Excessively Strong Water Flow
If the current in the spawning tank is very strong, it could wash the male Angelfish’s sperm right off the eggs before they are fertilized. So, when positioning the spawning slate, ensure that it is situated well away from the filter flow.
Poorly Managed Relocation Of The Eggs
If you decide to move the eggs to a separate tank for hatching, you might inadvertently cause problems.
Make sure that you don’t keep the eggs out of the water for too long when you’re transferring them, don’t touch the eggs, and ensure that the water parameters in the destination tank are identical to those in the spawning tank.
Failure to acclimate the eggs properly when moving them could kill them.
How To Remove Unfertilized Angelfish Eggs
First of all, it’s important to understand that not all the eggs will be viable, and some will die. However, you’ll still have hundreds of eggs that will survive.
But what do you do if some of the eggs develop fungus or turn white?
Don’t panic! If some of the eggs rot, get dirty, or develop fungus, the Angelfish will remove them before the other eggs in the clutch become diseased. Ideally, you don’t want to interfere with the nest, or you risk disturbing the fish, and they may abandon or eat their eggs and developing fry.
How To Prevent Angelfish Eggs From Being Eaten
Unfortunately, Angelfish eggs that are left in the tank with other fish in a general community tank tend to be eaten by hungry fish.
So, how can you prevent that from happening?
There are a couple of methods that professional breeders use to protect their Angelfish eggs and fry.
Do Nothing
Leave the fish, fry, and eggs in the spawning tank. Although you will lose a few to the adults and to other fish, some eggs and fry will survive. For that reason, many hobbyists who don’t want to keep too many fry favor this method.
Make sure that you provide plenty of dense planting, caves, and other hiding places where the fry can take shelter if necessary. Also, the filtration system can’t be too powerful or the fry might get sucked into it.
It’s worth noting that new parent fish will often eat their first couple of batches of eggs. That’s quite normal, and the fish usually go on to spawn again very quickly and successfully once they’ve had more practice.
Move The Eggs
If you want to obtain the maximum yield from each spawning, you can opt to remove the eggs from the breeding tank and relocate them to a separate aquarium where they can hatch in safety.
However, most hobby breeders prefer to let the parent fish do the job of raising their young, as, after the first few spawnings, Angelfish generally make exemplary parents.
How To Care For Angelfish Fry After They Hatch
When the eggs are a couple of days old, the Angelfish larvae inside the eggs are fully developed and are curled around their nutritious yolk sac. If you look at the eggs under a microscope, you’ll clearly see the blood flow through the embryo, as well as the beating heart of the baby Angelfish.
Wigglers
The stage immediately following the appearance of the larvae in the eggs is commonly referred to as the wiggler stage.
At this stage, the fry hatch but remain attached to the spawning site via a tiny filament that you’ll see protruding from the wiggler’s head. The tiny larvae have yet to develop their tails, eyes, and internal organs and draw the nutrition they need from their yolk sac.
If the wigglers become dislodged, their parents will tenderly pick them up in their mouths and replace them, as you can see in this hobbyist’s YouTube clip.
Free-Swimming Stage
Around three to five days after hatching, and once the larvae have consumed all their yolk sac, they become detached from the spawning site and swim freely around the aquarium.
Look closely at the fry, and you’ll see that their eyes are already developed. You can also see the tiny baby Angelfish breathing if you look at them under a microscope!
Feeding The Fry
For the first few days after they become free-swimming, the fry will feed on infusoria in the aquarium.
As the fry grows, you can feed them freshly hatched baby brine shrimp and microworms. A few weeks later, try adding crushed fish flakes to the mix, gradually transitioning to regular fish food after a further few weeks.
Although the fry can survive for up to 12 hours without food, you should ideally feed them four or five times every day to fuel their growth and keep them healthy.
When Should You Remove The Angelfish Parents?
Some hobbyists prefer to leave the parent Angelfish in the spawning tank to raise their young.
Many Angelfish parents continue to guard and raise their fry right up to the stage when the tiny fish begin to develop fins. However, some parents do eat the fry, presumably mistaking them for small food items, such as brine shrimp. For that reason, many aquarists decide to remove the parents and convert the spawning aquarium into a grow-out tank.
You can mitigate that behavior by placing the spawning tank in a quiet location where the fish won’t be stressed by sudden movements or noises outside the tank. Also, be sure to keep the parents well-fed so that they don’t mistake their fry for food.
Raising The Fry Yourself
If you don’t want to risk the loss of all your fry, you might want to try raising them yourself.
It’s generally easier and safer to remove the parents than the fry, as the mortality rate among relocated fry tends to be quite high. However, many hobbyists prefer to remove the eggs and transfer them to a special recipient tank.
Set Up The Recipient Tank
- Use a small, 1-gallon tank as the recipient tank. Wash the tank out thoroughly without using soap.
- Fill the tank three-quarters full with clean, dechlorinated water, ideally around 24 hours before you expect spawning to take place.
- Treat the water with fungicide, such as methylene blue, following the instructions on the packaging to determine the correct dosage rate. You might also want to add a few drops of Acriflavine per gallon of water to the tank. Acriflavine is an antiseptic that helps to guard against fungus and mold.
- Add a rigid airline to the bottom of the tank.
- Make sure that the water temperature is around 80oF.
- Now remove the spawning slate with the eggs from the breeding tank and put it into the recipient. Put the slate so that the eggs are facing the bottom of the tank, and have the air stone so that the bubbles rise close to the eggs.
- The eggs should hatch within about 60 hours, remaining in their wiggler stage for about five days after hatching.
- Once the fry are free-swimming, wait around 12 hours before you feed them.
- Carry out partial water changes every other day or so to keep the environment clean and healthy for the growing fry.
Transfer The Fry To A Grow-Out Tank
Once the fry have outgrown the recipient tank, usually after a week or so, you can move them into a larger grow-out tank of between 2.5 and 10 gallons.
Make sure that there’s plenty of space and keep the water clean by performing regular water changes.
Keep feeding the fry up to five times a day with high-quality food. When the baby Angelfish reach eight months of age, they will begin to pair off, as they reach adulthood and breeding age.
In Conclusion
Did you enjoy our guide to rearing Angelfish? If you did please share.
Angelfish are one of the most elegant and attractive tropical aquarium fish in the hobby. These fish are also pretty straightforward to care for and breed in the home tank. To encourage spawning, provide the fish with a large spawning tank, clean water of the correct temperature, and feed your breeding pair a high-quality, varied diet.
Although it might take a few attempts, once your Angels get the hang of things, you should be rewarded with lots of babies!
Did you breed Angelfish? Tell us your story in the comments box below.